EPOMAKER Magcore65 Lite Is A Fun Keyboard To Use, And The Inductive Switches Make A Difference
I received EPOMAKER Magcore65 Lite from Epomaker to review & give my opinion on it. It’s my first keyboard with inductive switches, so I appreciate this opportunity to try one. I quite liked the feeling of the keys while typing. The keys give a soft feeling, and they don’t produce a very strong sound. It also passed all my basic sound tests. The RGB lights are strong & look very beautiful, but since the keycaps aren’t passthrough, it’s not ideal to use it in the dark by default.
I found the build quality of this keyboard to be good enough, although there’s an obvious creaking sound whenever you press on the plastic body. I never encountered that while actually typing on the keyboard.
I find it a bit hard to recommend between Hall Effect and inductive keyboards. But I tried my best to illustrate the main differences between the two. I also appreciate having inductive switches in a wireless keyboard, since they use less power.
Having 3 connectivity modes in any keyboard is always welcome. It simply means I can use it with any device I want, including Bluetooth devices like my tablets. All the devices I tested with this keyboard worked, including an Android tablet, as well as my iPad pro.
The driver provides different ways to customize EPOMAKER Magcore65 Lite. From the key remapping that makes it easier to do a lot with the keyboard despite its small size to the customization of the backlight & macros. The additional features the inductive switches provide make this a very interesting keyboard, which is why I took my time to explain them one after the other.
Buy EPOMAKER Magcore65 Lite from AliExpress
#CommissionsEarned

Quickly go to:-
Unboxing & Overview
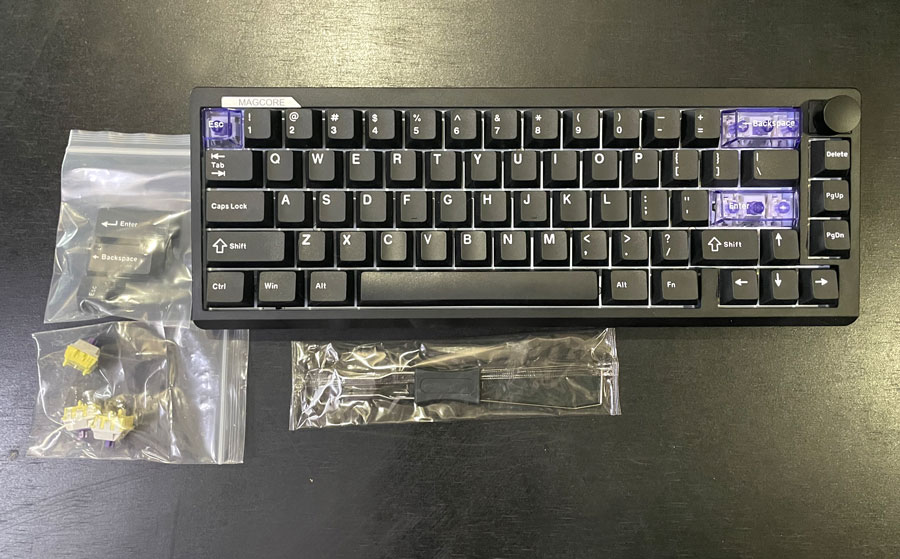
When I unboxed EPOMAKER Magcore65 Lite, I found the following in the box:-
-
- EPOMAKER Magcore65 Lite itself
- Braided USB cable
- Spare switches
- Keycap & switch puller.
- Delete, Enter & Escape keys
- A manual in multiple languages
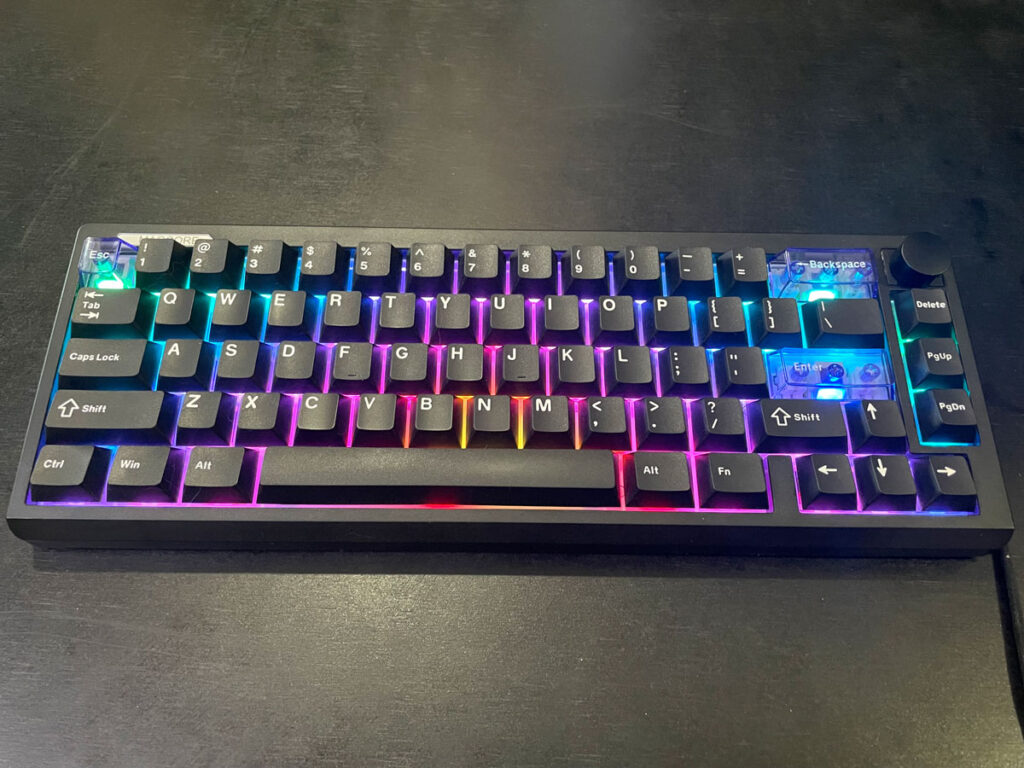
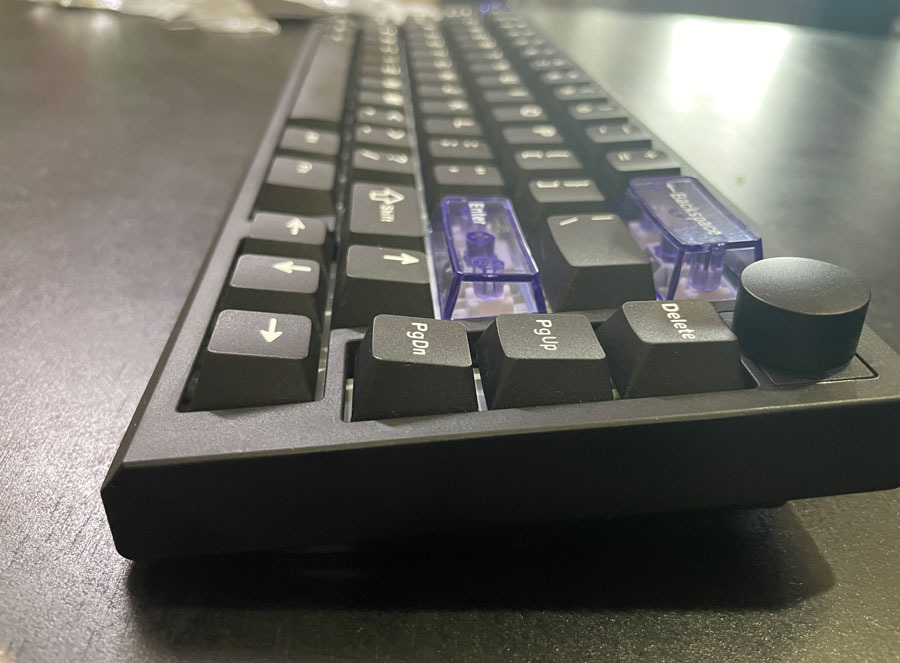
At first glance, EPOMAKER Magcore65 Lite is a 65% keyboard. It’s a compact design that lacks the numpad & the F-keys. They usually lack navigation keys, but the Magcore65 has 3 of them on the side, which can be very handy for Internet browsing & the like. 65% keyboards are almost the same as 60%, but they tend to have arrow keys. There’s a knob at the upper-right corner of the keyboard for adjusting the volume.
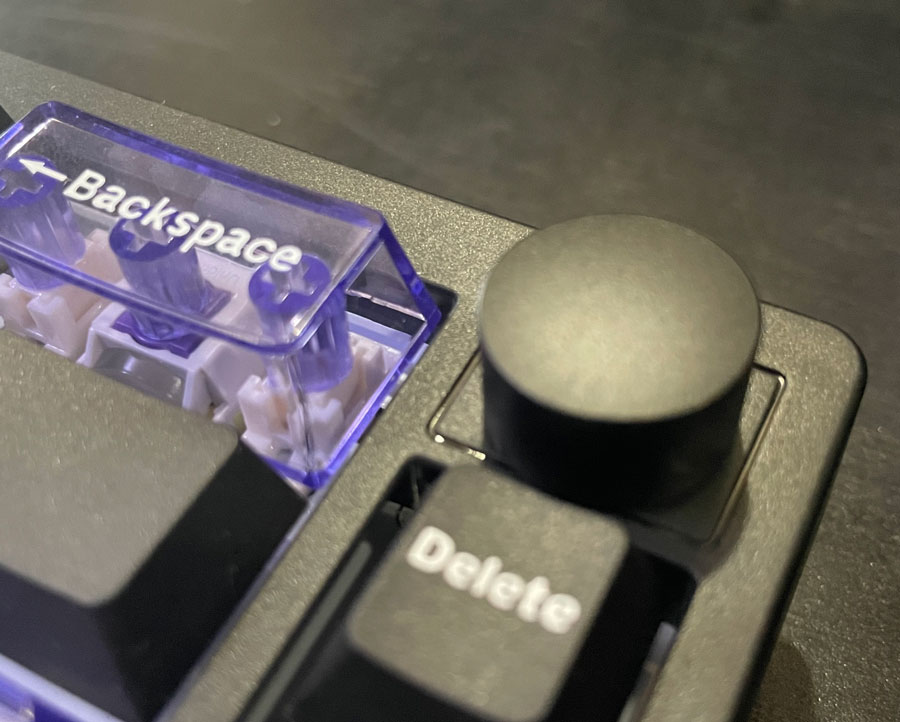
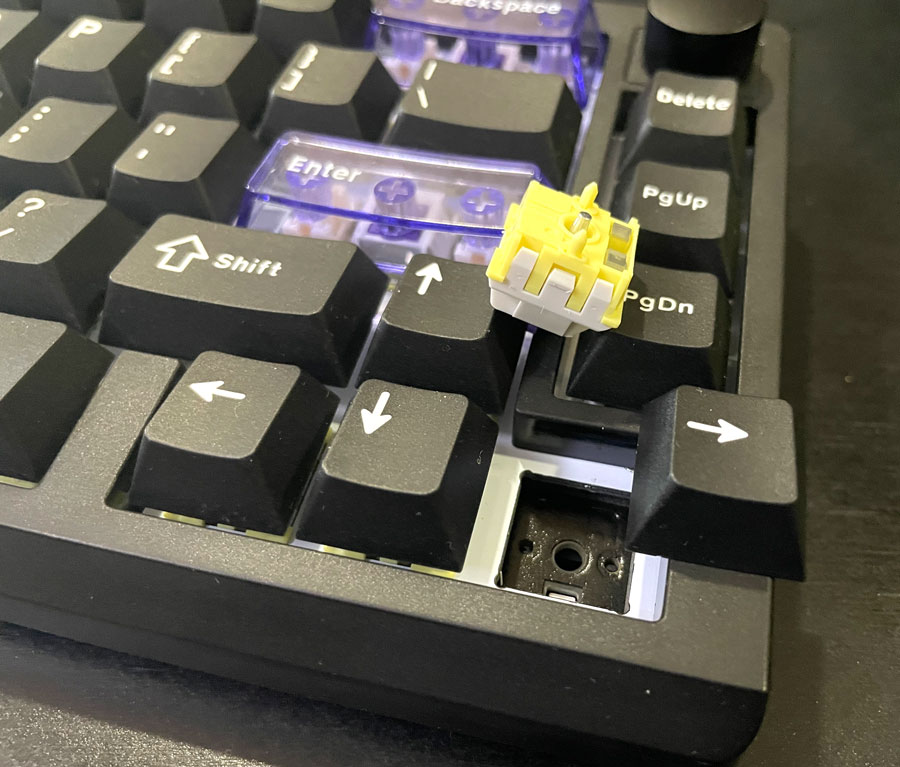
From the very first moment, the transparent blue keys (Escape, backspace & Enter) caught my attention; they look nice, especially when the backlights are turned on. They look more beautiful in person than in pictures. The keyboard comes with alternative black keys in the box in case you want your keyboard to be all black, but personally I will keep using it with the transparent keys. In fact, I want to replace all the keys with transparent ones like these.
![]()
EPOMAKER Magcore65 Lite comes only in black and only with Epomaker Core switches. You can always replace the PBT keycaps if you want to. The same goes with the switches, since it’s hot-swappable. But because of the inductive switches it uses, you can’t use your regular mechanical switches here. It comes with a few spare switches in case something went wrong with any of them.
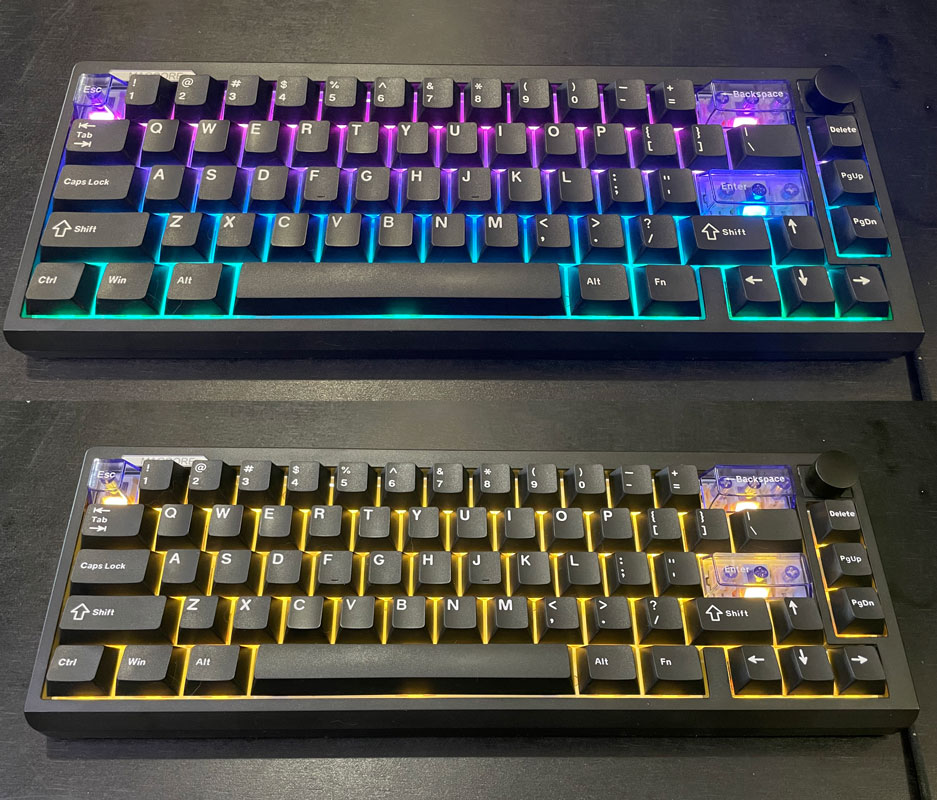
The RGB lights in the keyboard are really beautiful. So I tend to keep them on all the time, even if it affects the battery life. The keycaps aren’t passthrough, so using the Magcore65 in darkness isn’t exactly an option by default. The backlight turns off after some time to preserve power.
EPOMAKER Magcore65 Lite has a plastic chassis, which helps make it lighter. Although I noticed the chassis flexes a bit. It also makes a slight creaking sound when I press the front or back with my finger. I never noticed that during normal use, but it’s something I had to point out.
Typing Experience
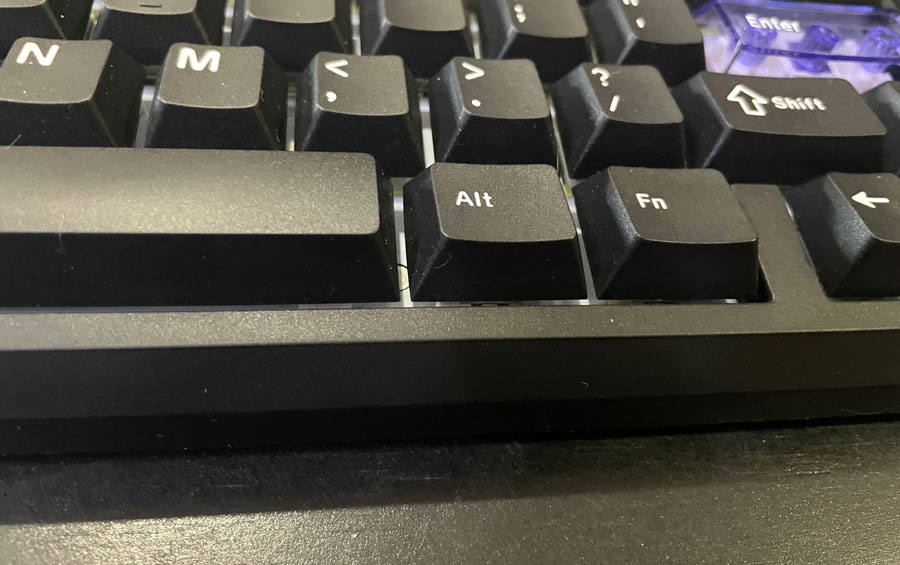
Usually, whenever I talked about the typing experience of any keyboard I review. I tend to talk about the sound & typing feeling separately. That’s because people look for different things in their keyboards. Some of the keyboards I reviewed had excellent typing feeling, but the sound wasn’t that impactful, and vice versa. That is exactly how I felt about typing on EPOMAKER Magcore65 Lite. The typing feeling is really awesome. The keys feel soft when pushed down. It was a joy typing with it; I guess this is going to be my favorite keyboard to use on my tablets (and even my computers when I want something smaller). One thing I noticed while typing is the 45° on the front of the bezel, which helps prevent my fingers from bumping into it while typing.
As for the sounds, the Magcore65 was kind of silent. The keyboard still makes a decent sound, but not what could annoy you much while typing. I could still hear it despite the fact I am wearing headphones & listening to some soundtracks. The sound is considered good, but there was not much of a “thock” if you’re looking into that. The sound of the small keys was quite decent. I did my usual sound tests, like testing how the large keys like the Enter, Shift & Space keys sound, and they were good. Some keyboards I tested produce a nice sound with the small keys but a pretty “meh” sound with the larger keys, so EPOMAKER Magcore65 Lite passes this test. I tried pounding my fingers on the keys while typing, just to see if there was any flexing; there was none. This keyboard passes my regular tests. It feels awesome to type on. Unless you like relatively silent sound, you may want to look for a keyboard that suits your sound preferences.
Since this is a 65% keyboard. It lacks the F-keys row. However, there’s always a way on smaller keyboards like this to produce these keys in case you ever need them. In the case of EPOMAKER Magcore65 Lite, you do that by pressing FN + Left CTRL at the same time, and that will transform the numbers row into the F-keys row. While I appreciate being able to access the F-keys the same way I could on larger keyboards, I would rather activate these keys using a key combination. At least that’s how I am used to. I solved this by assigning the FN layers so that pressing FN + 1 triggers the F1 keys, FN + 2 triggers F2 & so on.
The page up & page down keys to the right of the keyboard made it easier to navigate the text walls I am writing. Having 3-4 navigation keys to the side like that is so common, but not all 65% keyboards have it. I always appreciated having these two keys close by in some laptop keyboards that have it grouped along with the arrow keys. It could be just me, but the arrow keys felt like they had lower traveling distance, which is something I found comfortable and will likely be good for playing MSX games or any games that require the arrow keys.
Since this is an inductive keyboard, you can adjust the actuation point of each key separately. On the default settings, it was decent, but you can customize it so that the slight press on the key can trigger it. I did that, and while I made a bunch of typos in the typing test, it was a bit comfortable, since I didn’t need to press each key all the way down. I play a lot of games, but I don’t play FPS using a keyboard & mouse like many people do, but I think having a low actuation point can help with gaming, especially on the WASD keys. You can do the opposite & make the keys trigger when they are pushed all the way down. I did that for testing purposes. And I think setting the keyboard like that can help with typos. I know there are people who use heavier switches for that purpose, so being able to get that without replacing the switches on the keyboard is quite nice.
Some may think that this feature can change the typing experience in the same way replacing switches does. While the changes this brings are very noticeable, it’s not an alternative to replacing the key switches if the different feeling is what you’re looking for. It’s worth noting that the construction of the keyboard, regardless of the switches’ technology, plays a large part in how typing with it feels. This is why I tested it just like any other keyboard for the most part.
Given the layout of the keyboard, the up arrow keys & the right shift are a bit close to each other. This is typical on this keyboard form factor, so keep in mind you may want to spend some time getting used to it if you’re not familiar with it. Other than that, the keyboard works the same as any larger keyboard, except for the missing keys, which you probably don’t want if you opted for a keyboard this size. You can always get them back by customizing the FN layer, which is something I did myself.
I totally appreciate how the FN button is located at the right of the keyboard, as placing it on the left tends to interfere with the CTRL, Alt & Windows keys. While it makes it harder to press FN + 1-4 to trigger the F1-F4 keys with one hand, it makes it much easier to trigger some useful key combinations with the surrounding keys (like how I made FN + Left triggers the F4 key, which I use a lot).
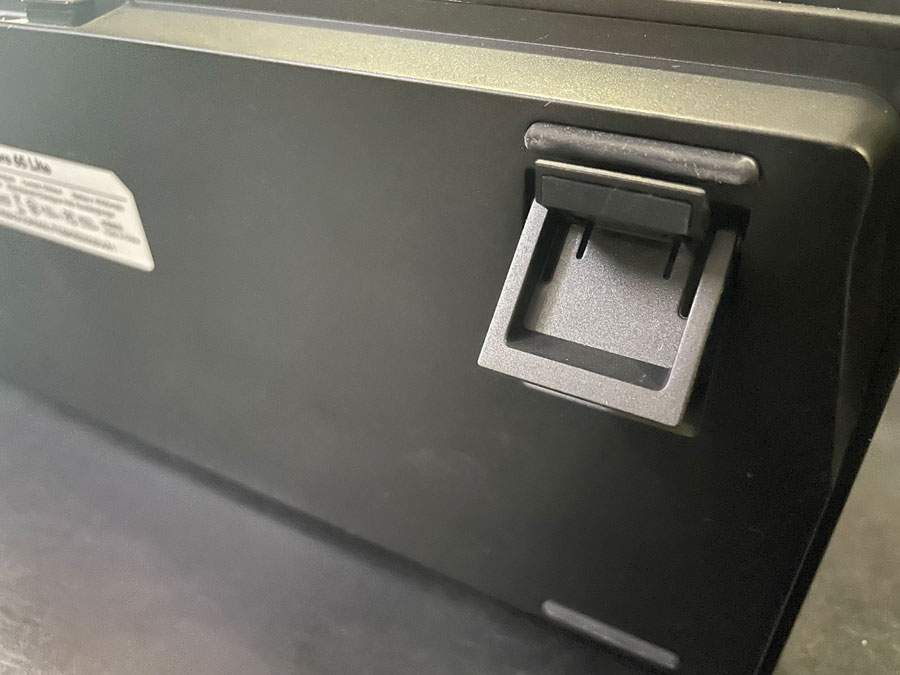
Just like the case with many keyboards, the typing angle is adjustable via the two pairs of legs at the bottom of the keyboard.
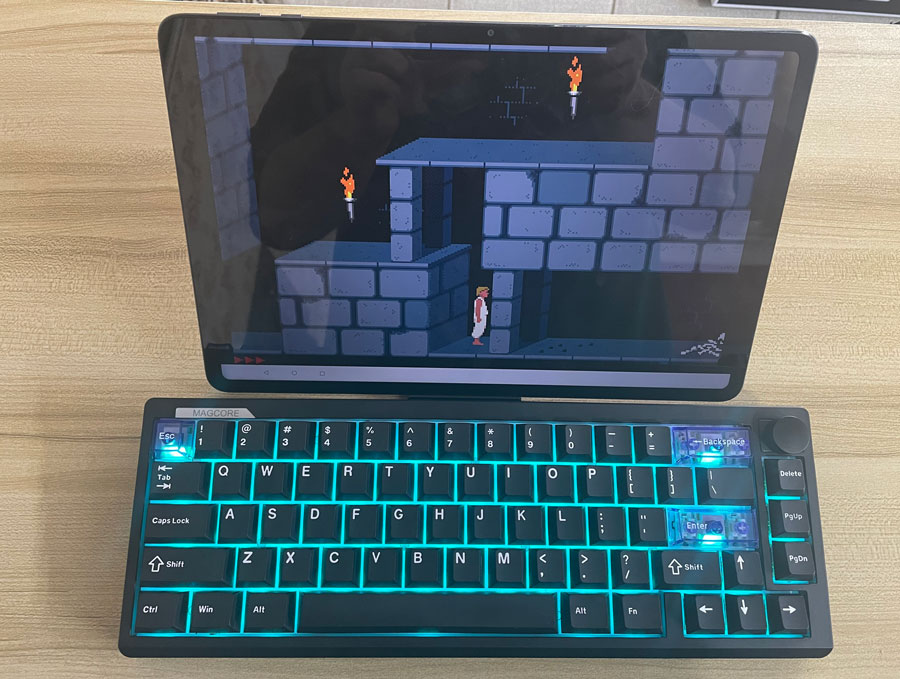
Since EPOMAKER Magcore65 Lite is a compact keyboard with Bluetooth, I had to try it with my tablets for navigation & playing my usual retro games. As usual, I tried playing Prince of Percia with this keyboard, which is something I did on many other keyboards I reviewed. You can see I am playing fan-made alternate stages this time. 😀
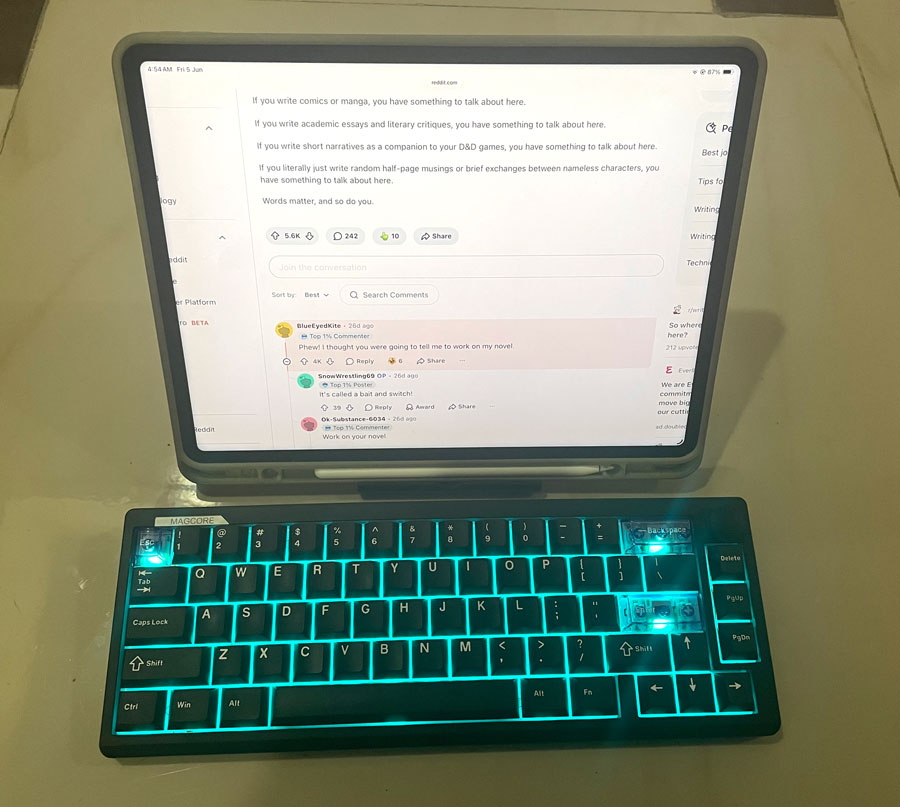
The product page says the Magcore65 is compatible with Windows, Mac & Android. It doesn’t say anything about iPad support. I tried pairing it with my iPad Pro, and it worked without any issues. USB & Bluetooth are established standards, so I expect EPOMAKER Magcore65 Lite to work with almost any device that supports them, if not all of them.

Inductive Switches:- Are They Better Than Hall Effect? What Are The Advantages?
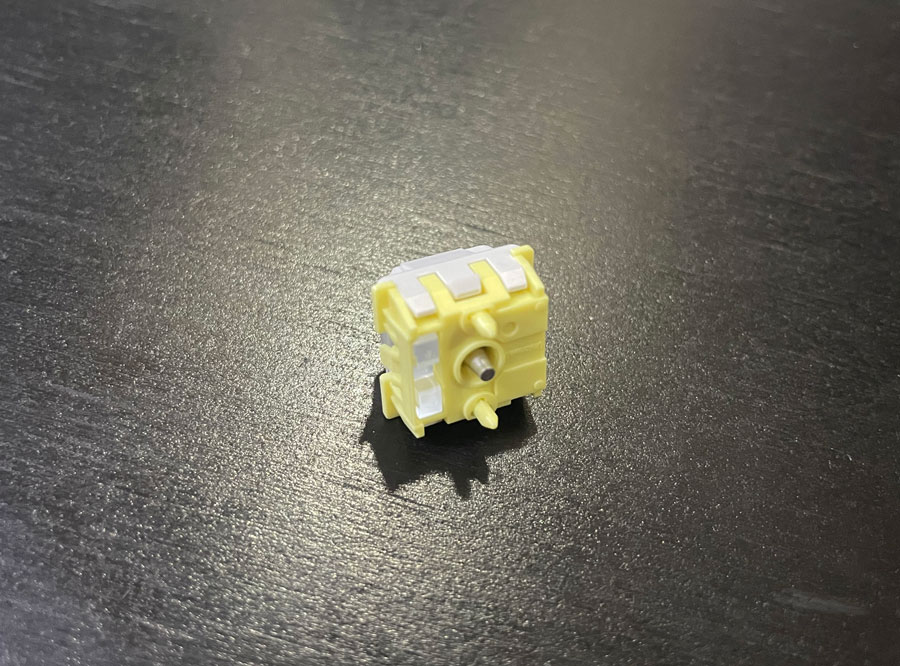
As I previously mentioned, EPOMAKER Magcore65 Lite having inductive switches is one of the main features that made me interested in it. Just like magnetic switches used in Hall Effect keyboards, they have the ability to detect key presses without much contact, which could cause wear & tear over time, and because of that, they last longer than regular mechanical switches. Inductive keyboards achieve that by having a metal rod pass through a coil, which disturbs a magnetic field, and the keyboard uses the interference to not only detect that the key was pushed down but also to determine how much it is pushed down. This gives us many features not found in regular mechanical keyboards, like the ability to customize the actuation point of each key. Even better, it also allows us to customize what each key does based on how much it traveled down, which is a neat feature. It’s one of the reasons I would recommend a keyboard with magnetic or inductive switches rather than mechanical ones.
To be quite frank, it can be tricky to recommend between Hall Effect and inductive switches, especially since inductive switches are still relatively new & a bit rare. But I can tell you about the main differences between the two. They both achieve the same thing in different ways. Inductive switches use less power, which is something to appreciate in a wireless keyboard like EPOMAKER Magcore65 Lite. Because of the lack of contact, both inductive & Hall Effect switches last longer than mechanical switches.
Unlike Hall Effect switches, inductive switches are not susceptible to magnetic interference, which is nice, although most of us don’t work in an environment where that’s an issue really. Inductive switches have few disadvantages; first, they are more expensive. The switches are rather limited. If your choices of switches with Hall Effect switches are rather limited, they are even more limited with inductive switches. That can change over time, of course.
In case you care about the sound profile, the choice of Hall Effect or inductive switches doesn’t matter much here. It’s the construction of the keyboard that determines that. Some people prefer regular mechanical keyboards over these new technologies for that very reason.
Here are some of the main features inductive switches provide, which you will find in EPOMAKER Magcore65 Lite’s driver page:-
Rapid Trigger
Rapid trigger allows you to trigger a key a second time without having the switch go all the way up. The switch simply resets as it passes a certain point and is ready to be triggered again. That point can be configured in the driver.
MT
MT allows you to trigger one key when you press the key lightly (the key has to go all the way up to trigger) or trigger another key when you press the key all the way down. This can be quite useful for productivity, and not just gaming.
MPT
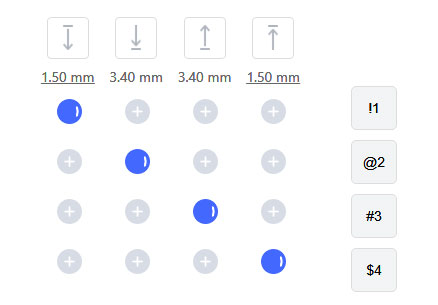
MPT allows you to trigger one of 3 keys based on how much you press a key down. Unlike with MT, the key doesn’t need to go back up to trigger any of the 3 keys. Simply lower the switch a bit, and you will trigger the first key, and it will repeat just as expected. Press it down a bit more and it will trigger the second key; press it all the way down & it will trigger the 3rd key. This allows us to have 1 key act as 3. You can customize how much you need to press down to activate each of the keys in the driver.
DKS
DKS allows you to trigger up to 4 keys using only one. You trigger 2 keys on the way down and another 2 on the way up. The keys don’t repeat at all. If you press lightly on the key and then release it, it will trigger the first & fourth keys only. You need to press all the way down to trigger all 4 keys.
SOCD
Say you are playing a game, and you use the A key to go right and the key D to go left. Now, what happens if you were pressing A and then suddenly pressed D while A was still down? How do you want this to be handled? There are multiple ways to go about this, and this can be handled on the hardware level (the keyboard) or at the software level, which is the game in this case. You can have the last key take priority, or maybe the first key should keep being triggered. Some keyboards cancel both keys, which makes them annoying to play even the simplest of games.
SOCD allows you to determine how the two key presses are handled at the keyboard level, regardless of which game or software you’re using.
TGL
TGL (or Toggle) is one of the easiest features to understand. It simply allows you to trigger a key by pressing it, and it will act as if it was pressed down until you press it again. This is pretty much the turbo mode of keyboards.
Suppose you activated TGL on the G key. You press it once, and you will get ggggggggggggggggggggggg, press it again & it will stop the barrage of Gs. You can use TGL to trigger a different key than the one you pressed too. Like, you can customize it so that you press the G key once, and it will trigger the H key (hhhhhhhhhhhhh). Pressing G again will stop the bombardment of Hs.
END h3The END allows you to trigger a different key when you release the one you’re holding down.
This is easier to understand with an example. Suppose that END is off and you press the G key down, and you will get gggggggggggggggggggggggggg until you release it. Now say we enabled END on the G keys and added the K key as the additional key; pressing down the G key will continue to produce the gggggggggggggg output as expected, but once you release the G key, you will get K at the end, and the output will be something like ggggggggggggggggk.
Customizing EPOMAKER Magcore65 Lite With The Web Driver

EPOMAKER Magcore65 Lite doesn’t support VIA/QMK but can be customized using the offline driver, which you can access from here. It provides you with all the typical features, like the ability to remap any key to another, remap a key to a shortcut (remap S to CTRL + S), or remap it to a macro. You can also customize & adjust the backlight, as well.
All the features of inductive keyboards I explained above can be accessed & customized from the driver page from the QuickTrigger & AdvancedKey tabs.
The FN layer can be customized separately for both Windows & Mac. I took advantage of that layer to get back some of the keys I want that aren’t usually available on 65% keyboards. You can see some of the customizations I did in the screenshot.
You can have multiple profiles. These profiles are named Input Config, Quick Config & Race Config, It is useful to have a profile for different tasks, like one for typing & another for gaming.
While the driver offers many good customizations, there are a few things I didn’t like about it:-
- As far as I know, you can’t switch between the 3 profiles without visiting the driver web page. It would be nice to have a hot key for that.
- You can’t customize what the knob does.
- If you selected a key to remap, it will still remap even when the tab isn’t active. You can avoid that by deselecting the key beforehand.
- You can remap the keys on the FN layer responsible for switching Bluetooth & 2.4GHz, as well as the one for switching to Windows or Mac mode, but you can’t remap them to other keys at all.
- It loads a bit slowly. Not a deal breaker, but I have to mention that.
3 Connectivity Modes

EPOMAKER Magcore65 Lite features the typical 3 connectivity modes available in many keyboards:- wired, Bluetooth & USB receiver. You can toggle between them with the toggle switch at the back of the keyboard. This is always a welcome feature, since it allows me to use it with my mobile devices (mostly my Android tablet & iPad), and that’s particularly important with smaller keyboards like this. The USB receiver can be found at the back of the keyboard in a dedicated & convenient rectangular hole for it. Bluetooth mode supports 3 different devices, and you can alternate between them by pressing FN + Q, R & E. You can also switch to 2.4Ghz mode by pressing FN + R as well.
And Finally
Overall, I found EPOMAKER Magcore65 Lite to be a satisfactory keyboard. It delivered on all the features it promised, and typing on it was quite enjoyable. There were few areas I didn’t like, but so far, I think it will replace my existing Dierya 65% keyboard. I have to be upfront again that I don’t play FPS games with a mouse & keyboard, but I think this keyboard can do you well with them.
I hope you liked my EPOMAKER Magcore65 Lite review, and I will see you in another Tech Fairy article. Check out the mobile apps I developed, which I hope you find useful & interesting.
Buy EPOMAKER Magcore65 Lite from AliExpress
#CommissionsEarned