The Iqunix Magi96 Pro Is An Excellent 96% Mechanical Keyboard
I received the IQUNIX Magi96 Pro from IQUNIX to review & give my opinion on. I used it as my main keyboard during the review period, and I plan on using it after that. This whole review about it was written on it. It is an awesome keyboard, with good design and an awesome typing experience. The feeling of each key, and the sound the keys make while typing made me really enjoy typing with it. Based on my experience, it’s equivalent to the Q series Keychron keyboard, like the Q11, which I reviewed here on Tech Fairy.
It has 4 connectivity modes. 3 for Bluetooth & one for the 2.4GHz receiver. Not to mention the wired mode. Each key can be customized via the VIA software, including the ability to create macros. The RGB lights are beautiful and can be customized in many ways. Although I have to specify that the keycaps aren’t passthrough.
If you’re looking for a compact 96% keyboard, I can easily recommend the IQUNIX Magi96 Pro. It passed my tests with flying colors.
Buy IQUNIX Magi96 Pro from Amazon:-
#CommissionsEarned

Quickly go to:-
Overview Of IQUNIX Magi96 Pro
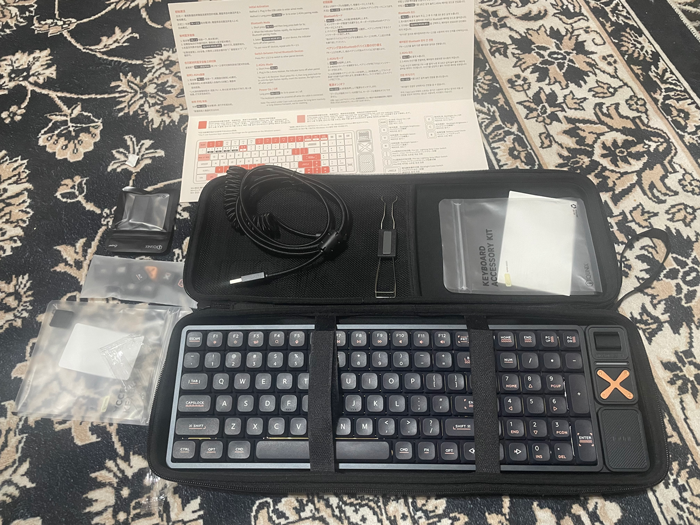
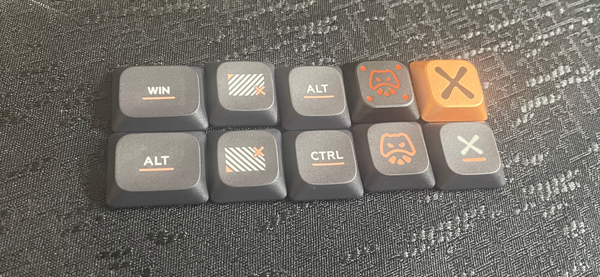
The IQUNIX Magi96 Pro comes in a carrying case out of the box. Which contained the keyboard itself, additional keycaps, a coiled USB cable, a quick start guide & USB converter:-
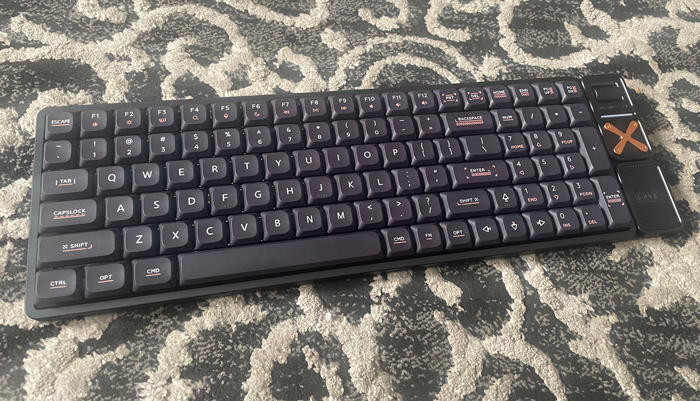
From the get-go, it was apparent that the Magi96 Pro is a really posh keyboard. From the aluminum chassis to the feeling of the keys. Everything about the keyboard feels premium. It is a bit on the heavy side, so it stays in place no matter how I type with it.
It’s a 96% keyboard, where the navigation keys are distributed around the keyboard, and the keys are pushed toward each others. Resulting in a compact keyboard without losing many keys. It lacks dedicated Pause, Scroll Lock & Insert keys. This form factor can be great for those who want the numpad but want the mouse close to them. The only thing I don’t like about this form factor is how the arrow keys blend with the rest of the keyboard. I often found myself pressing the 1 on the numpad instead of the up arrow key. However, given that I had two keyboards that were like that, it didn’t bother me the same as when I got the first keyboard like that. So keep that in mind if you’re used to arrow keys being in a separate island or in the corner of the keyboard. If you’re willing to get used to it, 96% form-factor gives you the best of both worlds of 100% keyboard & the more compact keyboards.
There are two versions of the IQUNIX Magi96, the regular & the pro version. The pro version has a roller as well as multimedia keys. This review will focus on the pro version, since it is the one I have hands-on experience with, but I am sure most of what I say about it will apply to the regular version.
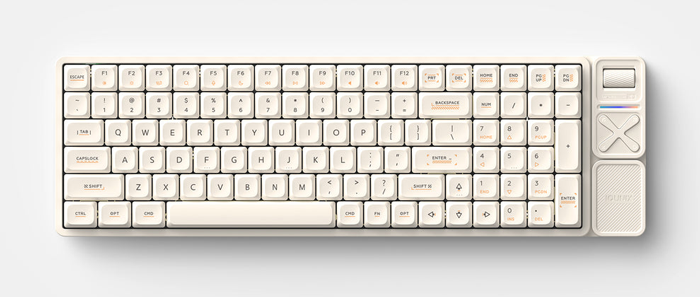
The IQUNIX Magi96 Pro comes in two colors, black and white. I have the black version. Here’s how the white version looks like:-
Typing Experience
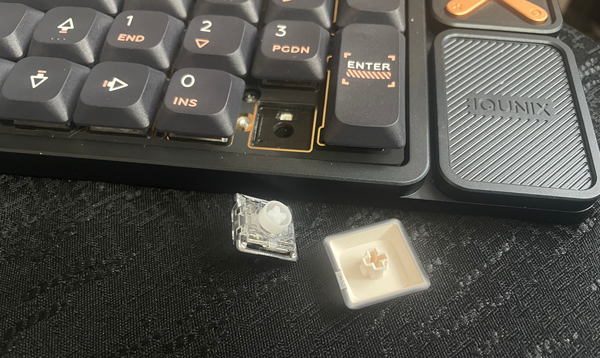
The IQUNIX Magi96 Pro is a really pleasant keyboard to type on, whether you care about the feeling of the keys or the sound. You will get both here. It comes equipped with Gold Red switches, which are linear switches with smooth resistance. It’s the only option they offer for switches. But since it is hot-swappable, you can replace the switches with any type you like in the future. Since I am a huge red switches fan, I will personally stick with Gold Red switches.
The keyboard itself is really sturdy and stable. Even when I pound my fingers on the keys, it never makes a ding sound or anything.
Given the layout of the keyboard. It lacks the insert key, which is a shame since I use it a lot. It is possible to access it by pressing FN + Numpad 0, but that required me to turn Numlock off, so that wasn’t a solution. I managed to solve that by mapping the Print Screen key to it via the VIA app (pun intended). We will get to that later in this review.
I used keyboards to do all sorts of things, from replying to E-Mail, posting online, developing my apps and typing the articles here in Tech-Fairy. I tried playing some keyboard-only games with it. I mainly played Castle Excellent on MSX emulator to see how it goes. It’s very pleasant to have a great keyboard to do all that, since it’s one of the things I use the most in my life.
The IQUNIX Magi96 Pro has both Windows & Mac modes, so if the modifier keys felt like they were mapped the wrong way, press & hold FN + Tab for a few seconds. And that will switch to the other mode.
FN Key Features
Just like most keyboards. IQUNIX Magi96 Pro gives you additional features that can be accessed via the FN key. You can adjust the volume, brightness, or even control the RGB lights & connectivity modes. I will talk about the last two in their dedicated sections. One thing I noticed is that you can adjust the volume up & down with FN + F11 or F12, respectively. You can also adjust it with FN + Up or Down arrows. So even without the pro version. Adjusting the volume is very accessible. Let’s not forget you can have it your own way by customizing it via the VIA app, including dedicating certain keys for that.
The keyboard itself can be turned on & off by pressing the FN + Escape key for a few seconds. I was confused at first; I didn’t know how to turn it on since there are no buttons on the side of the keyboard. So I initially activated it by plugging it into my computer via USB cable.
RGB Lights
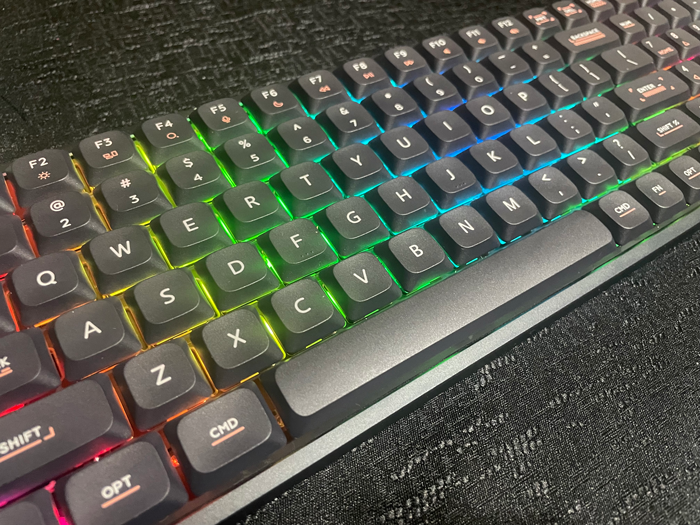
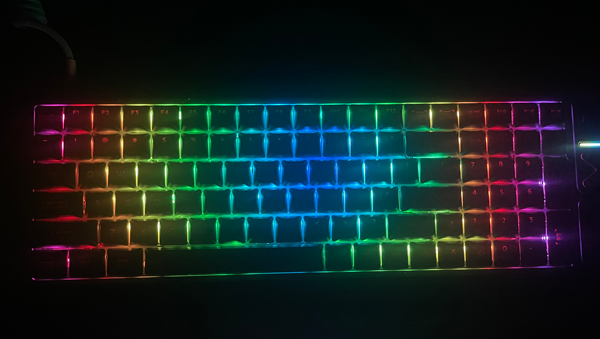
The IQUNIX Magi96 Pro comes with RGB lighting. It gives you all the standard effects you see in most keyboards. You can pick from many solid colors, as well as rainbow. There are many effects that range from no effect to wave to breathing (there are more effects than those 3). You can switch between the different colors by pressing FN + Shift. And between different effects by pressing FN + Enter. The backlight effect speed can be adjusted by pressing FN + V & N, respectively. Brightness can be adjusted by pressing FN + C, or if you like, you can turn it off altogether by pressing FN + Z.
It’s worth noting that when you press FN + Shift to change the RGB light color, the change is subtle, so you may need to press them multiple times until you get the colors & hue you want.
The backlights are really beautiful. The keycaps themselves aren’t passthrough though, you can still use them in darkness, but you may need to replace the keycaps if passthrough is a must for you.

Multiple Connectivity Modes
IQUNIX Magi96 Pro is generous when it comes to connectivity modes. You can connect up to 3 devices with Bluetooth. To pair a device via Bluetooth, press FN + 1, 2, or 3 to enter pairing mode. In that mode, the backlights will turn off, except for the Capslock, which will start blinking. The backlights will turn back on again once pairing is done. You can switch between the 3 Bluetooth devices by pressing FN + 1, 2, or 3 (without holding them down).
There’s also a 2.4GHz mode, where the IQUNIX Magi96 Pro connects to your computer using the USB receiver. The USB receiver is hidden inside a little compartment under the IQUNIX logo:-
![]()
I am not 100% sure about this, but I noticed you could press FN + 5 as well. I thought that was a secret Bluetooth mode or something, but the keyboard doesn’t appear in Bluetooth devices in that mode. My guess is that it is the wired mode. The manual doesn’t mention anything of that sort. It just tells you to plug in the keyboard via USB cable to enter wired mode.
I used the IQUNIX Magi96 Pro in wired mode the first day or so, both to test it out and to make sure the battery was fully charged. Then I kept using it in Bluetooth mode 1 most of the time. The battery lasts a few days very easily with backlights on. The backlight turns off when the keyboard is idle to save battery life.
Note:- You can check the battery level by pressing FN + B. The LED below the Capslock will blink a number of times to indicate the current battery level. When the battery is low, the backlight turns off completely to give the battery more life.
Pro Vs. Non-Pro Versions
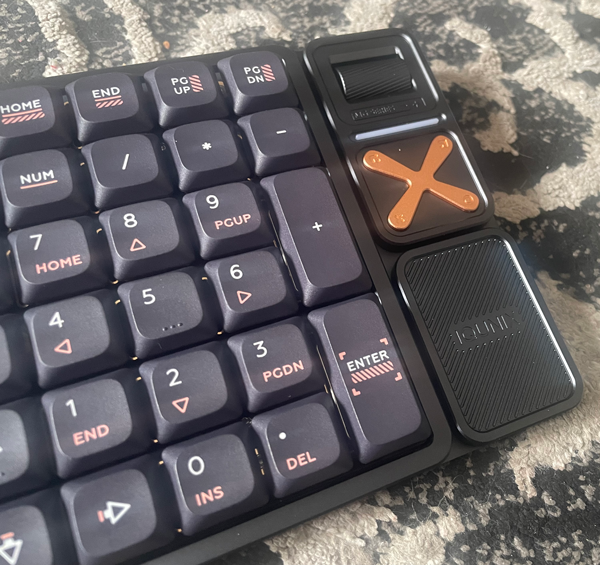
As I mentioned before, there are 2 versions of the Magi96. The pro & the non-pro. The most obvious difference is the additional bar at the far right of the keyboard. The bar provides few additional features:-
-
- A roller, which adjusts the volume by default.
- Light stripe.
- X button with 4 multimedia buttons (Play/pause, Mute, Next track & previous track).
- The compartment that contains the 2.4 GHz receiver.
In my opinion, the volume roller is the most important feature of the Pro version. I adjust the volume often based on what I am listening to while working, so having a dedicated roller for that is a huge plus. I even prefer it over having a knob. I find it worth the extra money for the pro version.
The X button can be quite useful; while I don’t use multimedia keys often, these can be customized to do other things. However, I found them a bit hard to press. Especially compared to how smooth the rest of the keyboard is. I could still use them for the stuff I don’t need often. For example, I needed an Insert key, so I mapped the PrintScreen key to that. Now I can remap one of the 4 X buttons to PrintScreen to get it back. I don’t use it that often, so it’s fine if I have to push it a bit harder.
The light stripe is beautiful. It’s a luxury feature you can live without, but it’s nice to have. Its color can be adjusted by pressing FN + ], and just like the RGB light, it ranges from solid colors to rainbow. You can adjust the effect by pressing FN + [. There are only 4 effects to choose from:-
- Solid color with no animation,
- Breathing mode.
- Wave mode.
- Turn the light stripe off.
Customizing The IQUNIX Magi96 Pro (using The VIA Software)
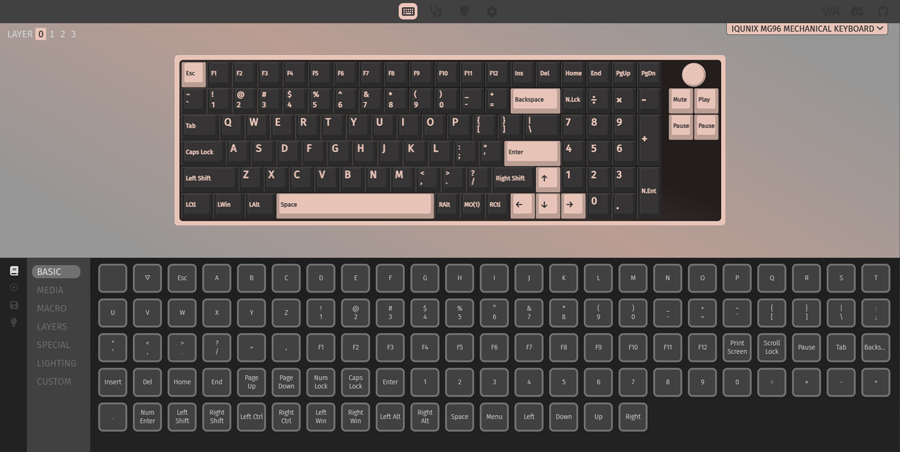
Every single key in IQUNIX Magi96 Pro can be customized using the VIA software. That was useful for me, as I needed an Insert key, so I sacrificed the PrintScreen key for it. The thing is, VIA doesn’t work with the IQUNIX Magi96 Pro right away. You need to download the JSON file from IQUNIX ‘s website first (you can find a useful firmware updating tool there as well). Then load that into VIA from the design tab, which is hidden by default. You only need to do that once. The keyboard also needs to be plugged in via USB cable, or else VIA won’t detect it. I don’t know if it’s ever possible to customize it while it is connected via Bluetooth, but this is what worked for me.
VIA basically allows you to remap any key to any other key, no matter what. You can have multiple layers as well. It also allows you to create macros, which can be useful in many tasks. Even if you don’t use the numpad, you can remap every single key in the numpad to help you become more productive.
And Finally
This was my first time trying out an IQUNIX keyboard, and I say I am satisfied with it. I already liked how it was out of the box, and the fact I can customize the switches later on, and that I can remap the keys to my heart’s content, means I can have a lot of fun with this keyboard for a while.
I hope you found my IQUNIX Magi96 Pro review useful, and I will see you in another Tech Fairy article. Check out the mobile apps I developed, which I hope you find useful & interesting.
Buy IQUNIX Magi96 Pro from Amazon:-
#CommissionsEarned