
Getting Your Local IP Address Is Important & Easy
Getting your Windows machine IP address is useful in many situations. It needs to be entered in many programs, like when you connect to a shared folder. Even some of the tutorials of Tech Fairy may require you to know how to get it. So, in this tutorial, I will explain more than one method of getting it.
Bear in mind that local IP is totally different than your public Internet IP address. The websites that shows your IP address shows your public IP address, which isn’t what we are looking for here.
Quickly go to:-
Finding The IP Address Using The Network & Internet Setting Window
This first method has very few steps, which is why we start with it:-
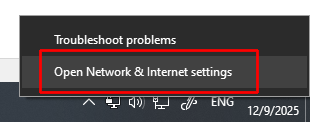
Right click on the network icon on the system tray.
![]()
Click Internet & Network Settings from the context menu
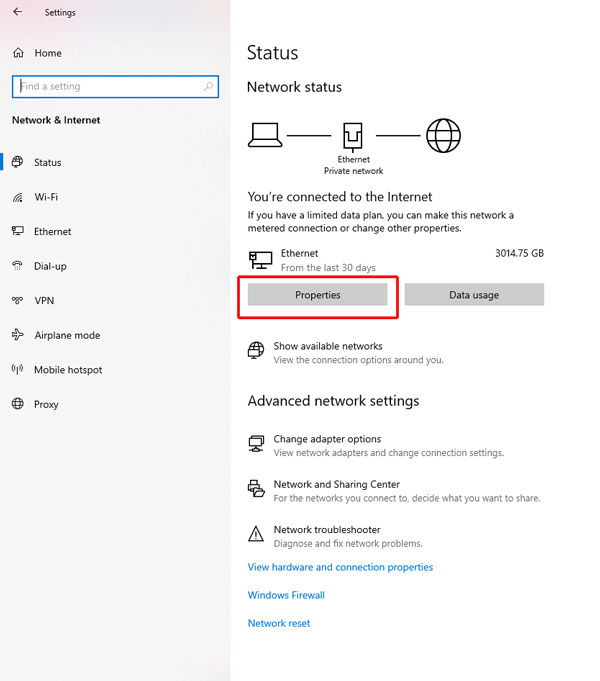
From the Internet & Network Settings window that appears, click on the Properties button.
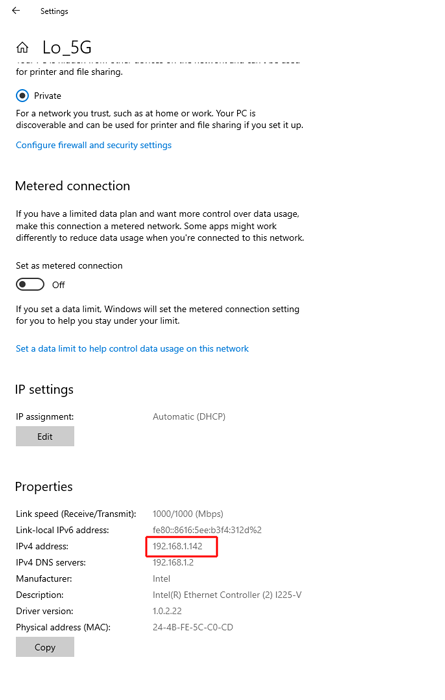
You get a window showing you various information about your network connection. The IP address is one of them. As indicated in the image below:-

Getting The IP Address For A Specific Network Adapter
This is one method that works in both Windows 10 & 11. It can be used to get the IP address of any network Interface you have, be it Wi-Fi, Ethernet or anything else.
First, let’s open the windows command line:-
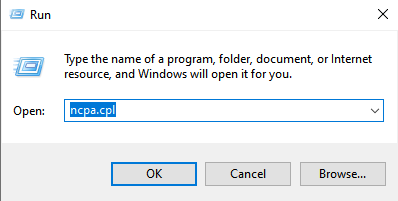
Press Windows + R on the keyboard to open the Run dialog
Type ncpa.cpl in the run dialog, then click on OK.
The Network Connections window appears:-
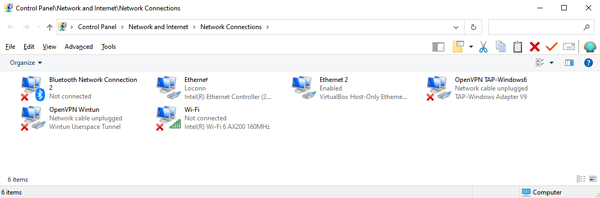
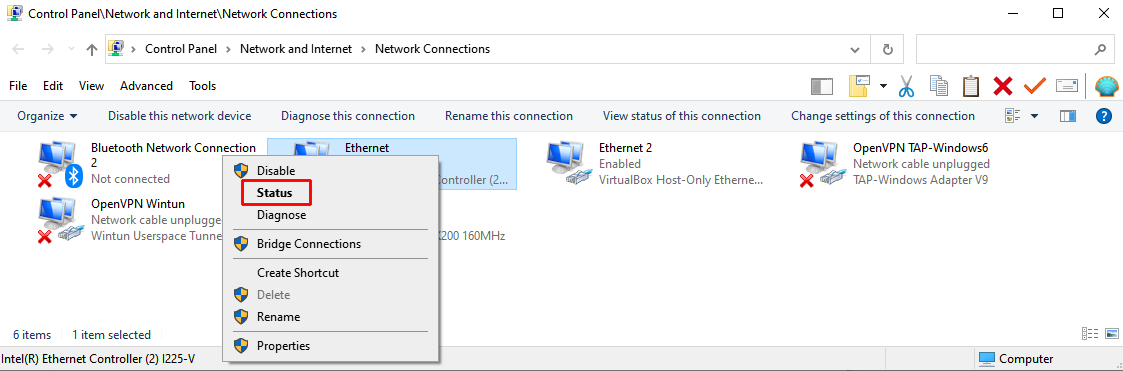
Right-click on the adapter you want to know the IP address for. For Wi-Fi, Right-Click on the Wi-Fi connection, for Ethernet, right-click on Ethernet. Pick the ones that have no red X in their icon, as shown here:-
I picked Ethernet in this example. From the context menu, click on Status:-
The Status window Appears. In the Status window, click the Details… button.
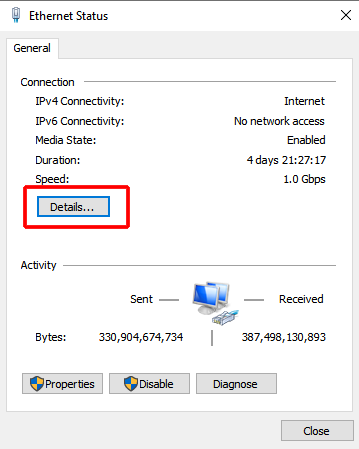
In the Network Connection Details window that appears, you can find the IP address right besides IPV4 Address:-

Finding The IP Address Using Command Line
Let me preface this by telling you that this method has one great advantage:- It is almost the same no matter what version of Windows you are using. You can use it on Windows XP, Vista, 7,8,10,11 & maybe beyond that.
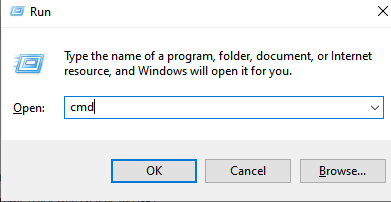
First, let’s open the windows command line. Press Windows + R on the keyboard to open the Run dialog. Type CMD in the run dialog, then click on OK:-
Type the command “Ipconfig” then press enter:-

Various information about the different network adapters are displayed here. As you may have guessed. A computer may have multiple IP addresses. One for each interface (one for Wi-Fi, another for Ethernet). You need to know which adapter you are looking for. If you are connected to the network using Ethernet, you will find it under Ethernet Adapter Ethernet, or something along these lines. If you are connected via Wi-Fi, it will be under Wireless Lan adapter Wi-Fi, or something similar:-
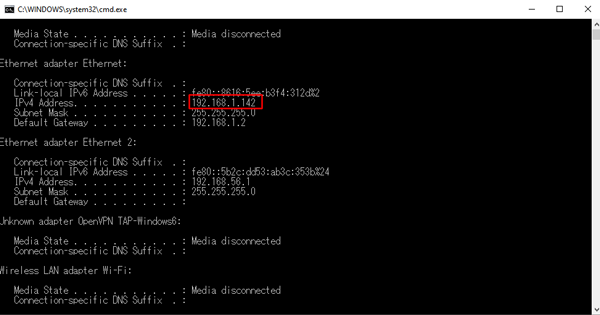
Some adapters don’t have IPv4 listed under them. These adapters are not connected, and so has no IP address.
And Finally
I hope this tutorial made it easier to find the IP address of your computer, and see you again in another article. Check out the mobile apps I developed, which I hope you find interesting.